Ultmate is a single-component, powdered cementitious tile grout, available in a wide range of colours, based on high-strength cements, fine crystalline aggregates, selected pigments, polymers and hydrophobising additives. Ultimate is a product with very low emissions of volatile organic compounds (VOC), conforming to class EC1 Plus according to the EMICODE protocol, to improve indoor air quality in buildings. Once mixed with water, it produces a grout with excellent workability and ease of application that, when applied properly, gives compact, water-resistant joints with excellent abrasion resistance and colour stability. It is resistant to freeze-thaw cycles. It is also characterised by short cleaning times. Ultimate is classified as an improved cementitious grout with additional characteristics of low water absorption and high abrasion resistance (CG 2 F W A) according to EN 13888.
Instructions for use
Preparation for laying
Check that the adhesive or bedding mortar used to bond the tiles has hardened well according to the times indicated on its technical data sheet. Mortars or adhesives still in a plastic state may interfere with Ultimate at the time of application, altering its colour. Carefully clean the joint by removing dust, crumbly material and dirt in general; remove any adhesive or hardened mortar spillage and wet it in the case of highly absorbent substrates and/or ceramic elements with high temperatures or strong ventilation, taking great care to remove any residual stagnant water from the joints, to avoid the formation of halos and lighter surface stains. Tiles with a very porous and absorbent surface, such as terracotta or certain types of natural stone, should be treated with Promural Silicon before grouting to facilitate cleaning after filling the joints. If using dark colours on unglazed tiles or light-coloured natural stone, carry out preliminary tests to ensure that thorough final cleaning is possible.
Product preparation
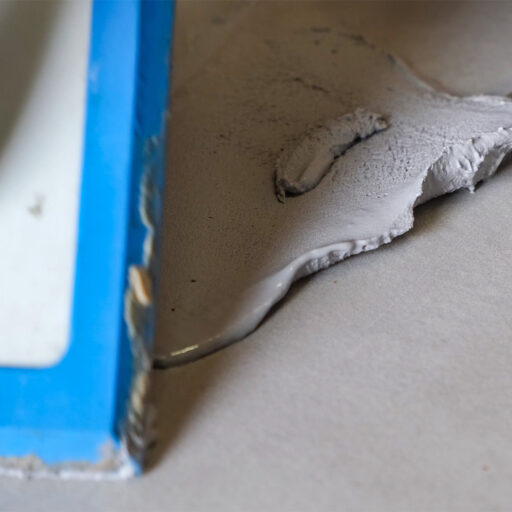
Mix Ultimate with 25% clean water (equal to 1.25 litres per 5 kg bag). The amount of mixing water may vary slightly depending on the colour of the product. Pour almost all of the required mixing water into a suitable container, then add the powdered product slowly, simultaneously mixing the mixture as it forms using a low-speed drill with a suitable propeller. Once all the powder has been added, pour in the remaining water and mix until the mix is smooth and creamy, lump-free and of the desired consistency, which will vary depending on the width of the joints to be grouted and the wall or floor application. Do not exceed the water dosage, as grouts mixed to too fluid a consistency may form halos and surface stains and may suffer excessive shrinkage during the plastic phase, resulting in reduced thickness, cracking and reduced mechanical performance. Remove lumps of unmixed material from the walls and bottom of the container. Allow to rest for 2-3 minutes, then stir briefly. The mix prepared in this way has a pot-life of approximately 20-25 minutes under normal conditions (at +20 °C); higher temperatures shorten the pot-life, while lower temperatures lengthen it. If several mixes are prepared for the same finishing job, it is important to use the same percentage of water to prevent the grouts from taking on different colour tones.
Laying instructions
Fill the joints well by spreading the grout with a rubber trowel and taking care not to leave any air gaps, then remove the excess.
Cleaning
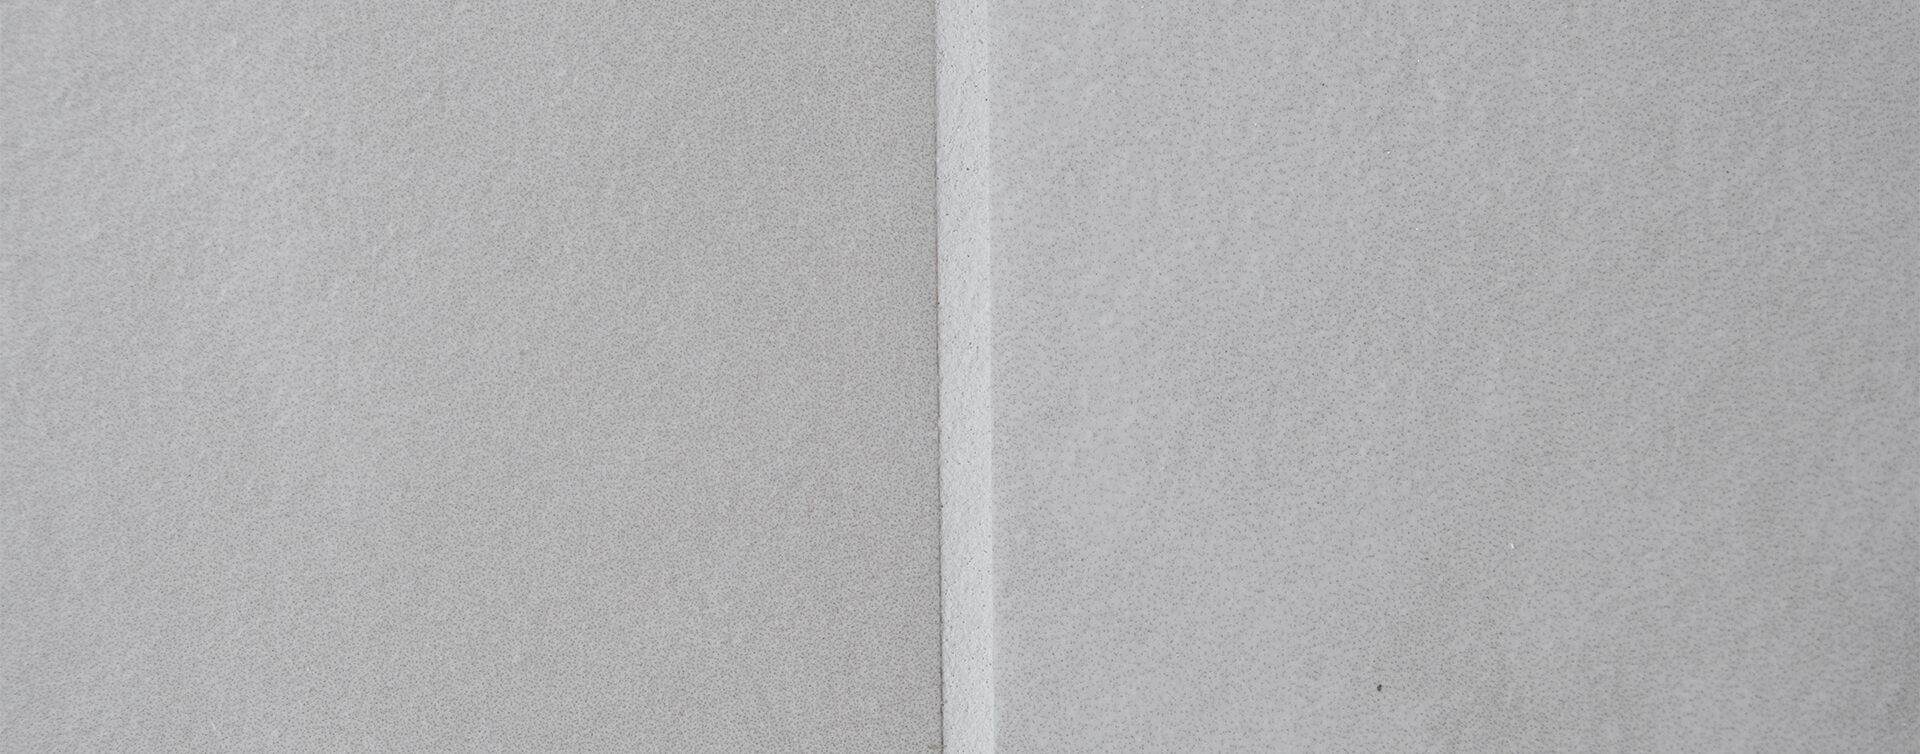
Wait until the grout in the joint has set for the first time (approx. 20 minutes) then clean the tiles and finish the joint surface using a soft, damp sponge that should be rinsed frequently with clean water. Never clean before the initial setting, as grout that is still fresh would be partially removed from the joints. In order to achieve an even finish and colour tone over the entire surface, take care that the sponge always has approximately the same degree of moisture, so as to avoid the formation of halos and lighter stains, or to avoid a different final colour tone. When the grout has dried, clean the tiles with a clean, soft, dry cloth.
Final cleaning
If any grout residues or halos remain, especially on tiles with a rough, absorbent surface, they can be removed with Tile Cleaner (acidic tile cleaner) no earlier than 7 days after grouting. Never use these types of cleaners on sensitive and acid-attackable floor and wall tiles (e.g. marble). The tools used for laying can be cleaned with water before the grout hardens; afterwards, cleaning can only be carried out by mechanical removal.


_black_")